If you’restarting clear aligners, your dentist may mention small, tooth coloured bumps called clear aligner attachments. They can look like a minor detail, but they play a real part in how your aligner treatment works.
At Pearl Dental Care, we take the time to walk you through each part of your aligner plan, attachments included, so you know what’s involved before anything begins.
Quick Overview
Clear aligner attachments are small, tooth coloured shapes bonded to certain teeth to help aligners grip and guide them.
They’re often used in clear aligner treatment, though not every patient, or every tooth, needs them.
They may help with specific tooth movements that a smooth plastic tray can find harder to manage on its own.
Their shape, size and placement depend on your treatment planning, and how well you wear your aligners can also influence results.
Whether attachments are part of your plan is something your dentist can explain once your teeth have been assessed.
Below, we explain how attachments work, how they’re placed and removed, and what to expect day to day.
What Are Clear Aligner Attachments?
Clear aligner attachments are small bumps made from tooth coloured composite resin, the same type of material used for white fillings. They’re bonded onto the tooth surface of specific teeth to give your aligners something to hold onto, so the trays can apply force in a more controlled direction.
Aligners are thin and slightly flexible, so on a smooth surface, a tray can slip a little as it pushes. Attachments act a bit like handles. Each aligner is shaped to fit snugly over them, so the tray can gently push or turn the tooth towards its desired position.
You may also hear them called aligner attachments. The name often depends on the aligner brand, but the basic idea is similar across systems, and they’re a common part of modernorthodontic treatment.
Why Do Some Teeth Need Attachments?
Tipping a tooth slightly forward or back is fairly simple for an aligner. More complex movements can be harder, such as:
Turning a rounded tooth, like a canine tooth or premolar
Moving a tooth up or down in the gum
Moving the root as well as the crown, rather than just tilting the tooth
Holding back teeth steady while front teeth move
Research suggestsattachments may help with root movement, rotations and moving teeth along the arch, though results across studies aren’t always consistent. A broader review of the evidence also found thatattachment design and placement should be tailored to each patient, as no single setup suits everyone.
Attachments can also help keep the aligner properly seated, which may reduce unwanted movements in teeth that are meant to stay still.
How Are Attachments Placed and Removed?
Attachments are usually placed when you receive your first aligners. The process typically looks like this:
The tooth surface is cleaned and lightly prepared so the material can bond.
A thin bonding agent is applied.
A template aligner, filled with composite material in the planned shapes, is fitted over your teeth.
A curing light sets the composite, then the template is gently removed.
Any excess material is tidied up.
When treatment finishes, the attachments are gently removed, and the tooth is polished back to a smooth surface. Your dentist will then talk you through retainers, which help hold your teeth in their new position.
What Affects How Clear Aligner Attachments Work?
Several things can influence how well attachments do their job, and treatment outcomes vary depending on your individual situation:
Shape and size. Attachments come in different shapes. A rectangular shape is common, while others are bevelled or rounded for particular movements.
Position on the tooth. Where an attachment sits changes how the aligner applies force.
The planned movements. Complex cases with more turning or root movement may need more attachments than mild crowding.
Wear time. Attachments can’t do much if your aligners spend long periods out of your mouth.
Attachment condition. An attachment can occasionally chip or come off. If this happens, let your dentist know so it can be checked and replaced if needed.
How to Care For Your Teeth During Clear Aligner Treatment
Attachments add a few small ridges to your teeth, and plaque can collect around their edges more easily. A little extra care helps:
Brush twice a day with fluoride toothpaste, paying attention to the edges of each attachment.
Clean between your teeth every day.
Clean your aligners when you brush.
Take your aligners out to eat and for drinks other than water, as sugary or acidic drinks can get trapped against your teeth.
Australian dental guidance highlights the importance of brushing and cleaning between your teeth during orthodontic treatment. It also advises against do-it-yourself teeth straightening without an in-person assessment and ongoing supervision.
A Considered Approach to Clear Aligner Attachments
Attachments are one small part of a bigger plan. Whether you need them, how many you need and where they go all depend on your teeth, your bite and the movements your plan involves.
If you’d like to find out whether clear aligners may suit you, and what attachments would mean for your treatment, our friendly team in St Marys is here to help. We’ll talk you through your options at a pace that suits you, with no pressure to decide on the day.
Placing attachments doesn’t usually require an injection. It’s common to feel mild discomfort or pressure when a new aligner is fitted over them, which tends to settle within a few days. Let your dentist know if an attachment feels sharp or rubs against your lip or cheek.
How long do aligner attachments stay on?
They usually stay on for the length of your aligner treatment, which can vary depending on your case. Some attachments may be added or removed partway through if your plan is adjusted.
Can attachments damage your teeth?
Attachments are bonded to the outer surface of the tooth and polished off by your dentist at the end of treatment. Keeping them clean matters, as plaque can build up around the edges.
Are aligner attachments noticeable?
They’re tooth coloured, so they tend to blend in, especially under clear aligners. People may notice them up close, particularly on front teeth, and the material can pick up some staining over time.
What happens if an attachment falls off?
Contact your dentist and let them know which set of aligners you’re up to. Keep wearing your aligners unless advised otherwise, and your dentist can tell you whether the attachment needs to be replaced to keep your planned movements on track.
References
Effects of composite attachments on orthodontic clear aligner therapy: a systematic review (Materials, 2022): https://pmc.ncbi.nlm.nih.gov/articles/PMC8778413/
Understanding the effectiveness of attachments in clear aligner therapy: design, placement, material selection and biomechanics (Australasian Orthodontic Journal, 2024): https://reference-global.com/article/10.2478/aoj-2024-0021
Teeth straightening and braces (Teeth.org.au, Australian Dental Association): https://teeth.org.au/teeth-straightening-and-braces
Having a dental bone graft can feel like a significant step, especially when you are not sure what the weeks and months ahead look like. The procedure itself is one thing. The healing process is another, and for most people, it is the part that raises the most questions.
Understanding what your body is doing at each stage makes recovery easier to manage. You can spot what is normal, recognise when something needs attention, and make choices that support rather than slow the process down. The dental bone graft healing stages follow a broadly predictable pattern, though individual timelines vary depending on a range of factors your dentist will discuss with you.
Bone grafting is most commonly carried out as preparation forplacing a dental implant, where sufficient jawbone volume is needed to anchor the implant securely.
Quick Overview
Dental bone graft healing stages span from the first 72 hours after surgery through to several months of bone maturation
Anyone who has been told they need a bone graft before implant placement, or to address bone loss, may find this guidance useful
Recovery may involve soft tissue closure, early bone cell activity, progressive integration, and eventual bone maturation
How quickly healing progresses depends on graft type, graft size, general health, oral hygiene, and lifestyle factors like smoking
Whether you are ready for the next step is assessed by your dentist using clinical examination and imaging, not a set calendar date
Keep reading to understand what happens at each stage, what supports healing, and what signs may need prompt attention.
What Is a Dental Bone Graft?
A dental bone graft is a procedure that adds bone material to an area of the jaw where bone volume or density has been lost. The graft material acts as a scaffold, giving the body a structure to build new bone around and through.
Bone loss in the jaw is more common than many people realise. It can follow tooth extraction, particularly if the tooth has been missing for some time. Gum disease that has reached the bone is another common cause: as the infection progresses, the bone supporting the tooth is gradually destroyed. Trauma and certain medical conditions can also reduce bone volume in specific areas of the jaw. As the Australian Government’s health information service notes,adequate jawbone is needed to hold a dental implant securely in place, which is why bone grafting is often a necessary step before implant placement can go ahead.
Graft material may come from several sources. It may be taken from the patient’s own body, typically from another area of the jaw, which is referred to as an autograft. It may come from a human tissue donor (allograft), from animal-derived material (xenograft), or from synthetic materials such as calcium phosphate compounds (alloplast). Each option has different properties and suits different clinical situations. In most cases,bone grafting restores lost jawbone volume following tooth loss, gum disease, or trauma. Your dentist will select the most appropriate material based on the size of the area, the reason for the bone loss, and your individual health profile.
Dental Bone Graft Healing Stages: The Full Timeline
Healing after a dental bone graft happens in overlapping phases. The gum tissue heals first, usually within a few weeks. Deeper bone healing takes considerably longer, often three to six months or more.
Each stage builds on the one before it. The blood clot that forms in the first hours protects the graft and sets up the environment for new blood vessel growth. Those new blood vessels carry the cells that begin forming bone. Over months, that early, soft bone hardens and matures into tissue dense enough to support a dental implant. Imaging at follow-up appointments lets your dentist assess whether each stage is progressing as expected.
The following is a general guide. Your dentist may use different timeframes depending on your case.
Stage 1: The First 72 Hours
The earliest phase of dental bone graft healing begins the moment the procedure is complete.
Your body’s immediate response to surgery is inflammation. This is not a complication. It is the body’s first step in healing. Blood vessels near the graft site dilate, and white blood cells move in to clean and protect the area. A blood clot forms around the graft material, sealing the surgical site and providing the initial scaffold that everything else builds on.
During the first 72 hours, you can expect some swelling, tenderness, and bruising around the area, which may extend to the face or jaw. Minor bleeding from the graft site is common, particularly in the first day. Discomfort is normal during this phase and is typically managed with prescribed or recommended pain relief.
What you should do in the first 72 hours:
Rest and keep your head elevated, particularly during sleep. This reduces blood flow to the area and helps manage swelling.
Eat soft foods only. Yoghurt, mashed potato, scrambled eggs, soft fish, and smooth soups are good choices. Avoid anything that requires chewing near the surgical site.
Avoid hot drinks and food. Heat increases blood flow and can disturb the forming clot.
Do not smoke. Smoking constricts blood vessels and significantly disrupts the early healing process.
Do not use a straw. The suction pressure can dislodge the blood clot.
Follow all post-operative instructions from your dentist precisely. This includes any prescribed antibiotics, which help reduce the risk of infection at the graft site.
The blood clot that forms during this stage is protective. Disturbing it can delay healing or introduce the risk of complications. Gentle care of the surrounding area is important from day one.
Stage 2: Weeks One to Six: Soft Tissue Healing and Early Bone Activity
By the end of the first week, most of the visible swelling and acute discomfort should be reducing rather than worsening. The gum tissue begins to close over the graft site, and surface healing becomes visible.
Under the surface, a different process is underway. Specialised cells called fibroblasts begin knitting together soft tissue. Osteoblasts, which are the cells responsible for forming bone, start to migrate into the graft material. New blood vessels begin growing through the graft, a process called angiogenesis. These new vessels are critical: they deliver the oxygen and nutrients that bone-forming cells need to do their work.
During this stage, the graft material itself is not yet integrated with your natural bone. It is acting as a scaffold while the body prepares to replace it with living bone tissue over the coming months.
What you should do during weeks one to six:
Continue with soft foods for as long as your dentist advises. Avoiding direct chewing pressure on the graft site protects the developing tissue underneath.
Begin gentle oral hygiene around the site as directed. Your dentist will guide you on when and how to clean near the graft area without disturbing it.
Attend your scheduled follow-up appointments. Your dentist will assess the gum closure and check for any signs of infection or complication.
Avoid strenuous physical activity in the early weeks. High-impact exercise raises blood pressure and can increase bleeding or swelling at the surgical site.
Gum disease can progressively destroy the bone supporting teeth, which is one of the primary reasonsbone in the jaw becomes insufficient to support a dental implant without prior grafting. Understanding why the graft was needed can help frame the importance of protecting the site as new tissue begins to form.
Stage 3: Months Two to Three: Early Bone Integration
By the second and third months, the graft site is entering one of its most important phases. The soft tissue over the graft is typically well healed. Discomfort has usually resolved. But the more significant process is happening deeper in the jaw.
After a dental implant is placed,the jawbone grows around the implant to hold it securely in place, a process that takes approximately three months. The bone-building phase that precedes implant placement follows a similar pattern: the graft material, acting as a scaffold, is progressively replaced by the patient’s own new bone cells.
This process is called osteoconduction when existing bone grows into the scaffold, and osteogenesis when bone-forming cells produce new bone directly. The result is a gradually strengthening area of jaw bone that begins to develop the density and volume needed to eventually support an implant.
During months two and three, most patients feel largely normal. There may be no outward sign of the significant biological activity occurring in the jaw. It is important not to interpret feeling well as a sign that the bone is ready. Bone integration proceeds on its own timeline, which imaging can confirm, not symptoms alone.
What to focus on during months two to three:
Maintain thorough but gentle oral hygiene throughout the mouth. Good oral hygiene reduces the bacterial load that can interfere with healing at and around the graft site.
Eat a nutritious diet that supports bone formation. Calcium, vitamin D, and protein are particularly relevant at this stage: calcium contributes to bone mineral density, vitamin D supports calcium absorption, and protein provides the building blocks for tissue repair and bone matrix formation.
Continue avoiding smoking. Nicotine restricts blood vessel growth, which directly impairs the new blood vessel formation that this stage of healing depends on.
Attend imaging appointments. Your dentist may use X-rays or cone-beam computed tomography at this stage to assess whether the graft is integrating as expected.
Stage 4: Months Three to Six: Bone Maturation
The fourth stage of dental bone graft healing involves the newly formed bone maturing and becoming denser. At the start of this phase, the bone that has formed is called woven bone. It is functional but relatively immature. Over the following months, the body remodels this into lamellar bone, which is denser and better organised, and better suited to bearing the load of a dental implant.
Published evidence on autologous bone grafts found thata three to five-month healing period was typically followed by computed tomography scans to assess bone volume before implant placement, underscoring that imaging confirmation rather than elapsed time alone determines readiness. Most patients who have had a dental bone graft proceed to implant assessment somewhere between four and six months after surgery, though this varies. The exact window depends on the graft type, the size of the area, and individual healing rate.
Your dentist will use imaging at this stage to assess bone density and volume before confirming whether implant placement can proceed.
What supports bone maturation:
Calcium-rich foods such as dairy products, canned salmon, and leafy greens
Vitamin D from oily fish, egg yolks, and sensible sun exposure
Adequate protein from lean meats, eggs, legumes, and tofu
Continued avoidance of smoking throughout this phase
Stage 5: Six Months and Beyond: Confirmation and Next Steps
For some grafts, particularly larger ones or those in challenging areas of the jaw, full integration may take closer to nine to twelve months. The body’s bone remodelling process does not stop at month six: it continues, and the bone continues to strengthen and adapt over time.
During this final phase, your dentist will confirm through clinical examination and imaging whether the grafted area has achieved the bone density and volume needed to support an implant. If imaging shows adequate integration, implant placement can be planned. If additional time or assessment is needed, your dentist will explain why and what the next steps look like.
Individual outcomes vary depending on the type of graft material used, the size of the graft, your overall health, and how consistently aftercare instructions were followed throughout recovery.
What Affects How Quickly a Dental Bone Graft Heals?
Several factors influence the rate and quality of bone graft healing. Understanding them helps set realistic expectations.
Graft type and size: Autografts, which use the patient’s own bone, are often considered to offer the most reliable integration because the material is already compatible with the patient’s biology. Larger grafts generally take longer to integrate than smaller ones.
Smoking: Smoking is one of the most significant factors associated with slower and less predictable healing. Tobacco usedelays oral wound healing and is linked to higher rates of dental implant failure. Nicotine impairs blood vessel growth and reduces oxygen delivery to the healing site. The effects are present throughout all stages of healing, not only in the early days.
Gum disease: Active gum disease in other parts of the mouth can affect the overall bacterial environment and healing capacity. Treating any existing gum disease before or alongside a bone graft is important for this reason.
Medical conditions: Conditions such as diabetes, osteoporosis, and certain autoimmune conditions can influence how the body forms and maintains bone. Medications, including bisphosphonates used to treat bone density conditions, may also affect healing. Your dentist will discuss these factors with you before and during treatment.
Nutrition and vitamin D: Vitamin D plays a direct role in bone metabolism and calcium absorption, both of which are important during the bone-forming stages of recovery. More than 30% of Australian adults havea mild to severe vitamin D deficiency, which can quietly affect healing outcomes if not addressed.
Oral hygiene: Consistent but gentle oral hygiene throughout recovery reduces the risk of infection at and around the graft site. Infection is one of the more common causes of graft failure and, where it occurs, typically requires prompt treatment.
Age: Bone healing tends to be slower in older patients, not because grafts are less suitable, but because the body’s cell regeneration rate naturally decreases with age. This does not mean grafting is less effective for older patients; it may simply mean a longer integration timeline.
How to Support Recovery at Every Stage
Caring well for a bone graft is not complicated, but it does require consistency across the full recovery period.
Diet: Soft foods in the early weeks protect the graft site from mechanical disruption. Over time, as healing progresses and your dentist gives clearance, diet can gradually expand. Hard or crunchy foods should be avoided near the graft site until your dentist confirms the bone has adequately integrated. Good nutrition throughout, particularly foods that support bone and tissue repair, is beneficial at every stage.
Oral hygiene: Gentle oral hygiene is important from early in recovery. This typically means careful brushing away from the graft site initially, transitioning to more thorough cleaning of the full mouth as healing progresses. Your dentist will provide specific guidance based on how your recovery is going.
Avoid smoking throughout recovery: The negative effect of smoking on bone graft healing is present at every stage, not only the first days. Continuing to smoke during the bone integration and maturation phases increases the risk of incomplete integration or graft failure.
Keep all follow-up appointments: Your dentist’s ability to monitor healing depends on regular clinical assessment and, where indicated, imaging. Missing follow-up appointments removes the opportunity to catch and address any issues early.
Avoid unnecessary pressure on the site: This includes not probing the area with your tongue or fingers, and taking care when brushing close to the graft area during the early healing stages.
When Should You Call Your Dentist During Recovery?
Some discomfort, swelling, and minor bleeding in the first few days is expected and normal. There are, however, symptoms that warrant prompt contact with your dentist rather than a wait-and-see approach.
Contact your dentist if you notice:
Pain that is worsening rather than gradually improving after the first few days
Swelling that increases after the first 48 to 72 hours rather than reducing
Persistent bleeding that does not settle with gentle pressure
Signs of infection: fever, pus or discharge at the surgical site, or a marked increase in pain
The graft site appearing to open or the graft material becoming visible
Significant loss of graft material from the site
Some minor graft particles may become dislodged during early healing. This can be normal. Substantial or repeated loss, or loss accompanied by pain and swelling, should be assessed. Your dentist can determine whether the healing is progressing normally or whether treatment is needed.
A Considered Approach to Bone Graft Recovery
A dental bone graft is a preparatory procedure, and how well it heals determines what comes next. The stages move at a biological pace that cannot be hurried, but they can be supported. Following aftercare instructions carefully, attending all follow-up appointments, and maintaining good oral hygiene and nutrition throughout the recovery period gives the graft the best conditions in which to integrate successfully.
Every patient’s timeline is a little different, and what applies to one situation may not apply to another. If you have had a bone graft and have questions about where you are in the recovery process, speaking with your dentist is always the right first step.
If you would like to discuss dental implants, bone grafting, or the steps involved in treatment, we welcome you to get in touch withPearl Dental Care.
Note: Any surgical or invasive procedure carries risks. Before proceeding, you should seek a second opinion from an appropriately qualified health practitioner.
Frequently Asked Questions
How long does it take for a dental bone graft to heal?
Soft tissue over the graft site typically heals within two to four weeks. Deeper bone healing, where the graft material integrates with natural bone and matures into solid, dense bone, generally takes three to six months. Larger grafts or those in more complex areas may take closer to nine to twelve months before implant placement can proceed. Your dentist will use imaging to confirm readiness rather than relying on elapsed time alone.
Is pain normal after a dental bone graft?
Some discomfort, swelling, and tenderness in the first few days after surgery is a normal part of healing. Discomfort should gradually ease rather than worsen over the first week. Pain that increases after the first few days, is severe, or is accompanied by swelling, fever, or discharge should be assessed by your dentist promptly, as these may be signs of infection or another complication.
References
Healthdirect Australia. (2025). ‘Dental implant procedure’. Healthdirect Australia, 12 June. Canberra, ACT: Australian Government Department of Health. https://www.healthdirect.gov.au/dental-implant
Medtronic Australia. (n.d.). ‘Dental Bone Grafting: What Is It?’. Medtronic Australia. Sydney, NSW: Medtronic. https://www.medtronic.com/au-en/patients/treatments-therapies/bone-grafting-dental/what-is-it.html
Better Health Channel. (n.d.). ‘Gum disease’. Better Health Channel. Melbourne, VIC: Department of Health, State Government of Victoria. https://www.betterhealth.vic.gov.au/health/conditionsandtreatments/gum-disease
Australian Dental Association. (n.d.). ‘Dental Implants’. teeth.org.au. Sydney, NSW: Australian Dental Association. https://www.teeth.org.au/dental-implants
Sakkas, A., Wilde, F., Heufelder, M., Winter, K., & Schramm, A. (2017). ‘Autogenous bone grafts in oral implantology: is it still a “gold standard”? A consecutive review of 279 patients with 456 clinical procedures’. International Journal of Implant Dentistry, 1 June, Vol. 3, No. 1, p. 23. https://pmc.ncbi.nlm.nih.gov/articles/PMC5453915
Australian Dental Association. (2025). ‘Policy Statement 2.2.4 — Tobacco’. Australian Dental Association, 24 October. St Leonards, NSW: Australian Dental Association. https://ada.org.au/policy-statement-2-2-4-tobacco
Healthy Bones Australia. (2024). ‘Vitamin D and Bone Health’. Healthy Bones Australia, August. Sydney, NSW: Healthy Bones Australia. https://healthybonesaustralia.org.au/your-bone-health/vitamin-d-bone-health/
Wearing clear aligners for 20 to 22 hours a day is a real commitment. That same commitment needs to extend to how you clean them.
Dirty aligners don’t just look unpleasant. They can trap bacteria against your teeth for hours at a time, increasing your risk of tooth decay and gum irritation. A consistent cleaning routine takes only a few minutes each day and makes a meaningful difference to the health of your teeth throughout treatment. Clear aligners areworn for up to 22 hours each day, which means any bacteria on the tray surface stays in close contact with your teeth for extended periods.
Quick Overview
A daily cleaning routine for clear aligners removes bacteria, plaque, and debris from the tray surface
Anyone currently wearing aligners, or about to begin treatment, may benefit from this guidance
Cleaning typically involves rinsing with lukewarm water, gentle brushing, and a daily soak
How consistently you clean, the products you use, and whether you brush before reinserting trays all affect outcomes
Persistent cloudiness, odour, or damage to trays are signs to speak with your dentist
Keep reading to understand the cleaning steps, which products are safe, and what to avoid.
Why Cleaning Your Aligners Matters
During treatment, saliva, food particles, and bacteria accumulate on the inner surface of the trays. The warm, enclosed space between the tray and your tooth surface creates conditions that support bacterial growth if cleaning is neglected.
Poor dental hygiene during aligner treatment increases the chance of gum disease, tooth decay, and staining. The benefit of removable aligners, compared with fixed appliances, is that both the teeth and the trays can be cleaned properly. That benefit only holds if you follow through.
When aligners are not cleaned properly, the risks include:
Bacteria buildup beneath the trays, which may increase the risk of cavities
Plaque accumulating at the gumline, contributing to gum irritation
Discolouration of the trays, making them more noticeable
Bad breath caused by bacteria trapped in warm, moist conditions
None of these outcomes is unavoidable. A straightforward cleaning routine addresses all of them.
Step 1: Rinse with lukewarm water every time you remove your aligners
Each time you take your aligners out, rinse them immediately under lukewarm water. This removes loose saliva and debris before it dries onto the surface. Avoid hot water entirely. Heat can warp the plastic, affecting the fit of your trays and potentially disrupting treatment progress.
Step 2: Brush gently with a soft-bristled toothbrush
Use a soft-bristled toothbrush to brush the inside and outside of each tray. A clear, fragrance-free antibacterial soap works well here. Avoid toothpaste, particularly whitening varieties, as the abrasive particles can scratch the plastic surface and create micro-grooves where bacteria can settle.
Step 3: Soak once daily
A daily soak helps disinfect your aligners more thoroughly than rinsing alone. There are several options:
Invisalign cleaning crystals: These are formulated specifically for aligner care. Key ingredients include sodium sulphate (a gentle cleaning agent that loosens debris), sodium carbonate (which raises alkalinity to break down mineral deposits), and sodium dichloroisocyanurate (which sanitises the surface). Dissolve one packet in lukewarm water, soak for 15 minutes, then rinse thoroughly before reinserting.
Diluted hydrogen peroxide: Mix equal parts hydrogen peroxide and lukewarm water. Soak for 15 to 30 minutes, then rinse and brush gently afterwards.
Diluted white vinegar: A tablespoon of white vinegar in a cup of lukewarm water can help address odour and light staining. Soak for 20 minutes, then rinse well.
Mild antibacterial soap solution: Add a small amount of clear, fragrance-free soap to cool water, soak for 20 to 30 minutes, and rinse thoroughly before reinserting.
Clear aligners can be cleaned more easily than fixed braces because they are removable. The Australian Dental Association advises that when cleaning your teeth, you should also clean your clear aligners, using anantibacterial soap and a spare toothbrush, then rinsing well with warm water.
The key risk with clear aligners is not the appliance itself, but what happens when cleaning is neglected. Bacteria colonise tray surfaces when trays are not cleaned regularly, and reinserting an uncleaned tray places those bacteria in direct contact with your tooth enamel for hours.
Individual outcomes vary depending on existing oral health, cleaning habits, and how consistently the routine is followed.
Diet: Coffee, tea, and dark-coloured beverages stain the plastic and should only be consumed after removing aligners. Sugary drinks consumed while wearing aligners trap sugar against the tooth surface.
Brushing before reinsertion: Reinserting aligners over unbrushed teeth introduces food particles and bacteria directly into the closed environment of the tray. Brushing and flossing before putting aligners back in is one of the most important habits in the entire routine.
How often you rinse: Rinsing each time you remove your aligners prevents dried saliva from hardening on the surface, making the daily brush and soak more effective.
Storage: When aligners are not in your mouth, they should be stored in their protective case. Leaving them on a bench exposes them to airborne bacteria and the risk of accidental damage.
A Considered Approach to Aligner Care
Maintaining good oral hygiene during aligner treatment reduces the risk of tooth decay and staining while keeping your trays clear and comfortable. Good oral hygiene during treatment is an important part ofcaring for teeth during treatment.
The steps above take only a few minutes each day and are worth doing consistently. If you notice persistent cloudiness, strong odour that does not resolve after cleaning, or any visible damage to your trays, it is worth speaking with your dentist before continuing to wear them.
If you would like guidance on aligner care or want to discuss whether clear aligners may suit your needs, we welcome you to get in touch withPearl Dental Care.
Aligners should be rinsed every time you remove them, and brushed at least twice a day, morning and evening. A soak in a suitable cleaning solution once a day provides deeper disinfection. Consistent daily cleaning helps prevent bacteria buildup, staining, and bad breath.
Can I use toothpaste to clean my Invisalign trays?
Most toothpastes, particularly whitening formulas, contain mild abrasives that can scratch the surface of clear aligner plastic. These scratches create grooves where bacteria can settle and are difficult to clean. A clear, fragrance-free antibacterial soap or dedicated aligner cleaner is a safer option for daily brushing.
References
Better Health Channel. (2025). ‘Orthodontic treatment’. Better Health Channel, 15 December. Melbourne, VIC: Department of Health, State Government of Victoria. https://www.betterhealth.vic.gov.au/health/conditionsandtreatments/orthodontic-treatment
Australian Dental Association. (n.d.). ‘Teeth Straightening and Braces’. teeth.org.au. Sydney, NSW: Australian Dental Association. https://www.teeth.org.au/teeth-straightening-and-braces
Healthdirect Australia. (2025). ‘Dental braces and retainers’. Healthdirect Australia, February. Canberra, ACT: Australian Government Department of Health. https://www.healthdirect.gov.au/dental-braces-and-retainers
After dental implant surgery, the choices you make at mealtimes matter more than many people expect. What you eat in the days and weeks following the procedure can directly influence how well the implant site heals and whether complications arise during recovery.
Knowing which foods to avoid afterdental implants is one of the most practical steps towards a smooth recovery, and it is something many patients wish they had been better prepared for beforehand.
Quick Overview
Diet plays a direct role in how well the implant site heals following surgery.
Anyone who has recently had a dental implant placed or is preparing for the procedure may benefit from understanding which foods to avoid during the recovery period.
Following a soft food diet and steering clear of certain food types helps protect the surgical site and reduces the risk of complications.
How long dietary restrictions are needed may vary depending on individual healing rates, the number of implants placed, and whether additional procedures such as bone grafting were involved.
Your dentist will advise when it is safe to gradually return to regular eating habits.
Keep reading to understand which foods to avoid, what to choose instead, and how your diet supports healing after dental implant surgery.
Why Your Diet Matters After Dental Implant Surgery
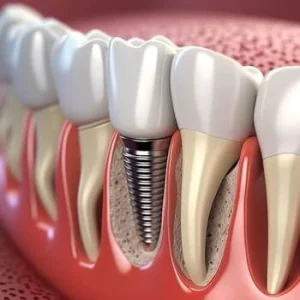
After a dental implant is placed, the area around the implant site is actively recovering. Gum tissue needs time to heal from the surgical procedure, and the implant itself needs to fuse with the jawbone through a process called osseointegration. This takes time, and what you eat can either support or disrupt it.
Hard, sticky, hot, spicy, or acidic foods can place unnecessary stress on the surgical site, introduce bacteria to the healing area, and cause discomfort or swelling. In some cases, poor food choices during recovery may contribute to implant complications.
Eating soft foods while the surgery site is healing isone of the key aftercare steps following dental implant placement.
Hard and crunchy foods put direct pressure on the implant area. This can disturb healing tissue, cause pain, and, in some cases, affect the stability of the implant before osseointegration is complete.
Avoid: nuts, chips, crackers, raw vegetables, crusty bread, whole hard fruits such as apples, and any food that requires significant biting force.
Sticky and Chewy Foods
Sticky and chewy foods can cling to the surgical site or pull at healing gum tissue. They can also be difficult to clean away thoroughly, creating conditions where bacterial growth is more likely.
Avoid: chewing gum, caramel, lollies, dried fruit, and tough or chewy meats.
Spicy and Acidic Foods
Spicy foods can irritate the soft tissues around the implant site and cause discomfort during healing. Acidic foods and drinks, including citrus fruits, can affect gum tissue and increase sensitivity at a time when the area is already vulnerable. The Australian Dental Association advises thatacidic foods and drinks should be avoided, particularly when oral tissues are at a higher risk of damage or erosion.
Avoid: citrus fruits such as oranges and lemons, tomato-based sauces, vinegar-heavy foods, spicy curries, chilli, and hot sauces.
Hot Foods and Drinks
Very hot foods and drinks can increase blood flow to the surgical site, which may contribute to swelling or interfere with blood clot formation. Cool or room-temperature foods are generally more comfortable and less likely to cause irritation during the early healing phase.
Avoid: very hot soups, hot beverages served at high temperatures, and freshly cooked meals straight from the stove. Allow foods and drinks to cool before consuming.
Carbonated and Alcoholic Beverages
Carbonated drinks can cause a fizzing sensation that irritates the surgical site and may disrupt healing. Alcoholic beverages can slow the body’s healing response and may interact with any medications prescribed after surgery.
Avoid: soft drinks, sparkling water, beer, wine, and spirits during the early healing phase.
What Can You Eat After Dental Implant Surgery?
A soft food diet during recovery does not mean poor nutrition. There are many gentle, nourishing options that support healing without placing stress on the implant site.
Good choices include: mashed potato, scrambled eggs, soft-cooked fish, smooth soups, yoghurt, cottage cheese, soft bread without crusts, well-cooked steamed vegetables, soft fruits such as banana, ripe avocado or tinned pear, and smoothies or protein shakes without seeds or hard pieces.
Protein-rich foods are particularly useful during recovery, as protein supports tissue repair. Dairy products such as yoghurt and cottage cheese also contribute to calcium intake, which supports bone health around the implant site.
How Long Should You Follow a Soft Food Diet?
The duration of dietary restrictions after dental implant surgery varies between individuals. In general, a soft food diet is typically recommended for at least the first one to two weeks following the procedure. Those who have had multiple implants placed or who have undergone bone grafting as part of the process may need to follow dietary restrictions for a longer period.
Dental implant treatmentrequires several appointments across the process, and recovery progresses in stages. Your dentist will monitor healing at follow-up appointments and advise when it is appropriate to gradually reintroduce firmer foods. It is important not to rush this process.
A Considered Approach to Dental Implant Recovery
Dental implant surgery is a significant procedure, and recovery requires care and patience. A soft food diet, combined with good oral hygiene and regular follow-up with your dentist, gives the implant site the conditions it needs to heal well. Individual outcomes vary, and your dentist’s post-operative guidance is the most reliable reference for your specific situation.
How long should I avoid hard foods after dental implant surgery?
Most people are advised to follow a soft food diet for at least one to two weeks after dental implant placement. The exact duration may vary depending on how many implants were placed, whether bone grafting was involved, and how quickly the individual heals. Your dentist will provide guidance based on your specific situation at follow-up appointments.
Can I drink coffee after dental implant surgery?
It is generally advisable to avoid very hot beverages, including coffee, in the days immediately following dental implant surgery. Hot drinks can increase swelling and irritate the surgical site. Once the initial healing period has passed and your dentist advises it is safe, lukewarm drinks are usually appropriate. Individual recovery timelines vary.
Note: Any surgical or invasive procedure carries risks. Before proceeding, you should seek a second opinion from an appropriately qualified health practitioner.
Australian Dental Association. (n.d.). ‘Policy Statement 2.2.2 – Diet and Nutrition’. Australian Dental Association. Australia: Australian Dental Association. https://ada.org.au/policy-statement-2-2-2-diet-nutrition
Department of Health & Human Services. (2007). ‘Dental treatment’. Better Health Channel. Melbourne, VIC: Department of Health & Human Services. https://www.betterhealth.vic.gov.au/health/conditionsandtreatments/dental-treatment
If you are considering dental implant treatment or have recently had dental implant surgery, you may be wondering about light smoking after dental implant treatment. Many people ask whether cutting down is enough or whether smoking only occasionally will affect healing.
Smoking and dental implants do not work well together. Even light smoking can influence the healing process and long-term implant success. Understanding how smoking affects your body’s natural healing process can help you make informed decisions during recovery.
Why Healing Matters After Dental Implant Surgery
Adental implant procedure involves placing a titanium post into the jaw to act as a stable base for a replacement tooth. After implant placement, the surrounding bone tissue must heal and attach firmly to the implant. This process is known as successful implant integration.
The early stage is called the initial healing phase. During this time:
A protective blood clot forms at the surgical site.
Soft tissues begin to close over the area.
Bone healing begins around the implant.
If this healing period is disrupted, the implant may not bond properly with the bone. This can increase the chance of dental implant failure.
How Smoking Affects Blood Flow And Healing
One of the main concerns with cigarette smoking is its effect on blood vessels.
Nicotine causes blood vessels to narrow. This can:
Reduce blood flow to the implant site.
Limit oxygen supply to bone tissue.
Interfere with blood clot formation.
When blood flow is reduced, the body’s healing process slows down. A slower healing process increases the risk of infection and may delay bone healing.
Even light smoking can reduce blood flow enough to affect the surgical area. While smoking less may seem safer, it still places stress on the body’s natural healing process.
Light Smoking After Dental Implant: Is It Safer?
Some patients believe that smoking only a few cigarettes a day is unlikely to cause harm. However, light smoking after dental implant placement still carries risk.
Research consistently shows that dental implants and smoking are linked to lower implant success rates. Compared with non-smokers, smokers generally have a higher risk of complications.
Light smoking may not cause immediate problems, but it can:
Increase the risk factor for infection.
Contribute to a delayed healing process.
Reduce overall implant success.
Implants fail more often in patients who continue smoking during the healing period.
The Risk Of Infection And Bone Loss
Smoking affects both soft tissues and bone tissue.
When you are receiving dental implants, the surgical procedure creates a small wound in the jaw. The body relies on healthy blood vessels and immune responses to protect that area.
Smoking increases the risk of infection because it:
Slows the immune response
Irritates gum tissue
Reduces circulation
Over time, smoking can also contribute to bone loss and gum disease. These conditions threaten long-term implant treatment and may compromise overall oral health.
Ifperiodontal disease or gum disease is already present, smoking can make it worse. This combination significantly increases the likelihood that implants fail.
Smoking And Dental Implants: Long-Term Effects
The concern is not only during the first few weeks after implant surgery. Smoking habits also affect long-term stability.
Implant dentistry depends on healthy bone and gum support. Continued smoking can:
Reduce bone density.
Affect bone grafts used to prepare the area.
Increase inflammation in the gums.
Over time, this may weaken the foundation supporting the replacement tooth.
Even after successful implant integration, ongoing smoking can threaten implant success years later.
The Healing Period: Why The First Weeks Matter Most
Smoking during this time interferes directly with the body’s healing process. That is why many dentists strongly advise avoiding smoking completely during the healing period.
Even light smoking can disturb the surgical site by introducing heat, chemicals, and reduced oxygen levels into the mouth.
Quitting Smoking Before Implant Surgery
If you are planning dental implant treatment, stopping smoking in advance can improve outcomes.
Quitting smoking before the surgical procedure allows:
Improved blood flow
Better oxygen supply
More predictable healing
Smoking cessation does not need to be permanent to be helpful, but long-term quitting offers the greatest benefit for better oral health and overall oral health.
Some patients explore nicotine replacement therapy, such as patches or gum. These options may still contain nicotine, which can reduce blood flow, so it is important to discuss them with dentists.
Supporting Implant Success After Surgery
If you have recently undergone implant surgery, you can support implant success by focusing on recovery habits.
1. Maintain Excellent Oral Hygiene
Good oral hygiene reduces the risk of infection. Follow the instructions given after implant placement and attend regular dental check-ups.
2. Follow Dietary Advice
A healthy diet supports bone healing. Soft foods are usually recommended during the early healing process to protect the implant site.
3. Manage Stress
Stress can affect the body’s healing process. Basic stress reduction methods, including controlled breathing exercises, can assist the body during recovery.
Many patients assume that implant success is only determined months after surgery. However, stability begins to develop much earlier, and certain changes during the healing phase can signal whether integration is progressing well.
After implant placement, the titanium surface must bond with the surrounding bone. This process happens gradually and cannot be seen with the naked eye. Even if the implant feels stable initially, true biological stability depends on bone cells attaching to the implant surface over time.
Light smoking can interfere with this microscopic bonding process. Reduced oxygen levels and narrowed blood vessels may affect how bone-forming cells function. This does not always cause immediate pain or visible swelling. In fact, healing can appear normal on the surface while deeper integration is compromised.
During follow-up visits, a dentist may assess stability by checking for mobility, discomfort, or subtle changes in the surrounding gum tissue. In some cases, imaging is used to monitor bone levels around the implant.
Because integration is gradual, the absence of early symptoms does not always guarantee long-term success. This is why the early healing window is so important. Avoiding light smoking during this period gives the implant the most favourable biological conditions to bond securely with the jawbone.
Understanding that implant stability develops beneath the surface helps explain why even small lifestyle habits can influence outcomes.
Are Implant Success Rates Really Lower For Smokers?
Yes. Studies consistently show that implant success rates are lower among smokers compared with nonsmokers.
This does not mean implants will automatically fail in someone who smokes. Many smokers still experience successful implant integration. However, the increased risk is well documented.
Reducing smoking is helpful, but complete smoking cessation provides the greatest improvement in outcomes.
Making The Appropriate Decision For Your Oral Health
If you are concerned about light smoking after dental implant treatment, the appropriate approach is to avoid smoking during the healing period and ideally beyond.
Dental implants represent a long-term commitment to restoring your smile and chewing function. Protecting that investment means supporting bone healing, protecting soft tissues, and reducing infection risk.
Speaking openly with dentists about your smoking habits allows them to create a realistic treatment plan. In some cases, they may recommend delaying implant placement until smoking is reduced or stopped.
Final Thoughts
Light smoking after dental implant treatment may seem harmless, but even small amounts of cigarette smoking can reduce blood flow, interfere with blood clot formation, and slow the body’s natural healing process.
Smoking and dental implants are linked to higher implant failure rates and increased risk of infection and bone loss. For the best chance of implant success, avoiding smoking during the healing period is strongly advised.
If you are concerned about light smoking after dental implant treatment or would like personalised advice about protecting your implant during healing, book a consultation with us at Pearl Dental Care or call 02 9158 6312. We can review your medical history, discuss your recovery stage, and provide clear guidance to help support stable, long-term implant health.
Note: Any surgical or invasive procedure carries risks. Before proceeding, you should seek a second opinion from an appropriately qualified health practitioner.
Resources
“Colgate Editorial Team. (2023). ‘What Is Good Oral Hygiene?’. Colgate, 9 January. New York, NY: Colgate-Palmolive Company. https://www.colgate.com/en-us/oral-health/adult-oral-care/what-is-good-oral-hygiene”
“Mayo Clinic Staff. (2024). ‘Dental Implant Surgery’. Mayo Clinic, 23 October. Rochester, MN: Mayo Foundation for Medical Education and Research. https://www.mayoclinic.org/tests-procedures/dental-implant-surgery/about/pac-20384622”


 Clear aligner attachments are small bumps made from tooth coloured composite resin, the same type of material used for white fillings. They’re bonded onto the tooth surface of specific teeth to give your aligners something to hold onto, so the trays can apply force in a more controlled direction.
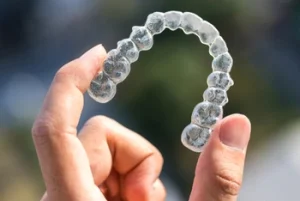
 Attachments are one small part of a bigger plan. Whether you need them, how many you need and where they go all depend on your teeth, your bite and the movements your plan involves.

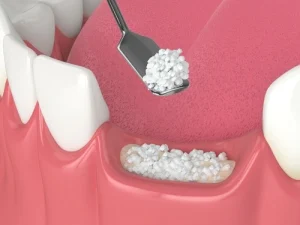 Healing after a dental bone graft happens in overlapping phases. The gum tissue heals first, usually within a few weeks. Deeper bone healing takes considerably longer, often three to six months or more.
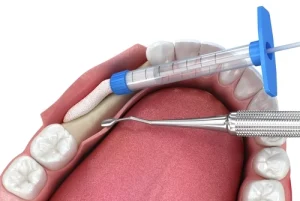 The fourth stage of dental bone graft healing involves the newly formed bone maturing and becoming denser. At the start of this phase, the bone that has formed is called woven bone. It is functional but relatively immature. Over the following months, the body remodels this into lamellar bone, which is denser and better organised, and better suited to bearing the load of a dental implant.
 A dental bone graft is a preparatory procedure, and how well it heals determines what comes next. The stages move at a biological pace that cannot be hurried, but they can be supported. Following aftercare instructions carefully, attending all follow-up appointments, and maintaining good oral hygiene and nutrition throughout the recovery period gives the graft the best conditions in which to integrate successfully.

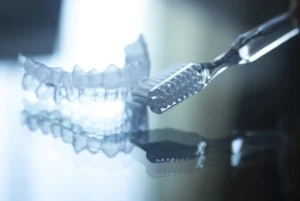 Step 2: Brush gently with a soft-bristled toothbrush
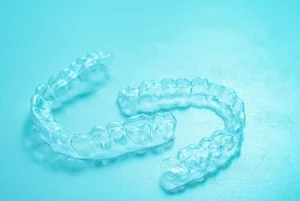 Maintaining good oral hygiene during aligner treatment reduces the risk of tooth decay and staining while keeping your trays clear and comfortable. Good oral hygiene during treatment is an important part of

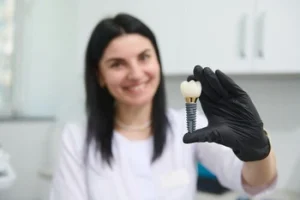 After a dental implant is placed, the area around the implant site is actively recovering. Gum tissue needs time to heal from the surgical procedure, and the implant itself needs to fuse with the jawbone through a process called osseointegration. This takes time, and what you eat can either support or disrupt it.
 The duration of dietary restrictions after dental implant surgery varies between individuals. In general, a soft food diet is typically recommended for at least the first one to two weeks following the procedure. Those who have had multiple implants placed or who have undergone bone grafting as part of the process may need to follow dietary restrictions for a longer period.

 Nicotine causes blood vessels to narrow. This can:
 Quitting smoking before the surgical procedure allows:
 If you are concerned about light smoking after dental implant treatment, the appropriate approach is to avoid smoking during the healing period and ideally beyond.